Developer Machine Setup
Step-by-step instructions to set up RudderStack on your developer machine.
This guide lists the steps required to set up RudderStack in your development environment.
Introduction
Installing and setting up RudderStack involves two key steps:
- Control plane setup
- Data plane setup
Refer to the RudderStack Architecture to know more about the RudderStack control plane and data plane.
Control plane setup
There are two ways you can set up the control plane. This section lists the steps involved in each of them.
Using the RudderStack-hosted control plane
- Sign up and log into the RudderStack dashboard.
Why do I need to sign up for RudderStack?
RudderStack's dashboard lets you easily set up your data pipelines by configuring your sources and destinations. It is fully hosted by RudderStack and is free for the users. You also get access to some important features like Transformations and Live Events.
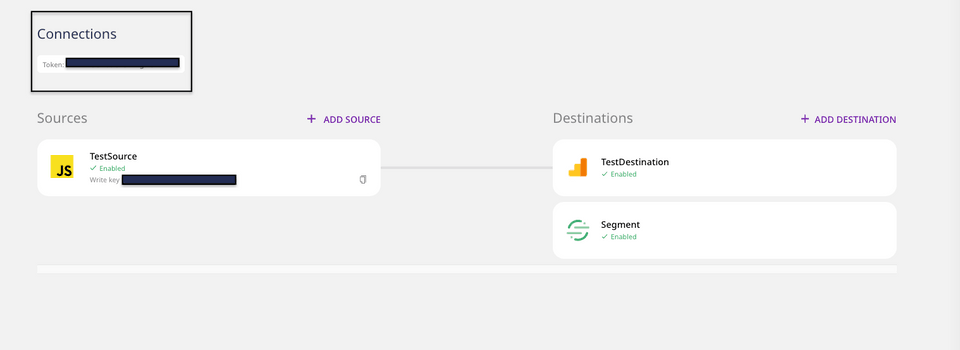
- Note and copy your workspace Token from the top of the page, as shown below. This will be required for setting up the data plane.

Self-hosting the control plane
You can self-host your own control plane using the open-source Control Plane Lite.
Note that the control plane set up using the Control Plane Lite utility lacks certain features like Transformations and Live Events.
Data plane setup
This section lists the steps to set up the RudderStack data plane in your preferred development environment.
Prerequisites
To set up RudderStack, you will need to set up and install the following tools:
- Go 1.13 or above.
- Node.js 10.6 or above.
- PostgreSQL 10 or above
For the RudderStack-hosted control plane
- First, set up the database in your preferred directory using the following commands:
createdb jobsdbcreateuser --superuser rudderpsql "jobsdb" -c "alter user rudder with encrypted password 'rudder'";psql "jobsdb" -c "grant all privileges on database jobsdb to rudder";- Next, clone the RudderStack server repository:
git clone https://github.com/rudderlabs/rudder-server.gitThen, run
git submodule initandgit submodule updateto fetch therudder-transformerrepository.Next, navigate to the Transformer directory using the following command:
cd rudder-transformer- Install the dependencies using the command
npm i. Then, start the destination transformer using the following command:
node destTransformer.jsNavigate back to the main directory using the command
cd rudder-server.Next, copy
sample.envto the main directory using the following command:
cp config/sample.env .envUpdate the
WORKSPACE_TOKENenvironment variable in this file with the workspace token you copied from the RudderStack dashboard.Finally, run the RudderStack server using the following command:
go run -mod=vendor main.go- Once you have completed these steps above successfully, send test events to verify the installation.
For the self-hosted control plane
If you have self-hosted the control plane using the open-source Control Plane Lite utility, follow these instructions to set up the RudderStack data plane in your development environment.
Once you have successfully followed the steps above, send test events to verify the installation.
Contact us
If you come across any issues while setting up RudderStack, you can contact us or start a conversation in our Slack community.